The SPM Scheduler page displays a calendar view of scheduled tasks and resources, which may be assigned to those tasks. You can adjust the scheduled date of tasks and assign tasks to resources (personnel and equipment) using this page.

Task Details
Planned tasks will appear in the Tasks section. The date of a task can be changed in two ways:
1.Drag and drop the task to a different date in the calendar.
2.Double-click the task and select Edit Current Task. Set new Start and End Dates in the Details tab, then click Save.
If moved to a different date, resource assignments already made to that task will also be moved.
Batch Scheduling
SPM Enterprise can batch schedule tasks within the Scheduler page > Tasks tab using the SCHEDULE button.
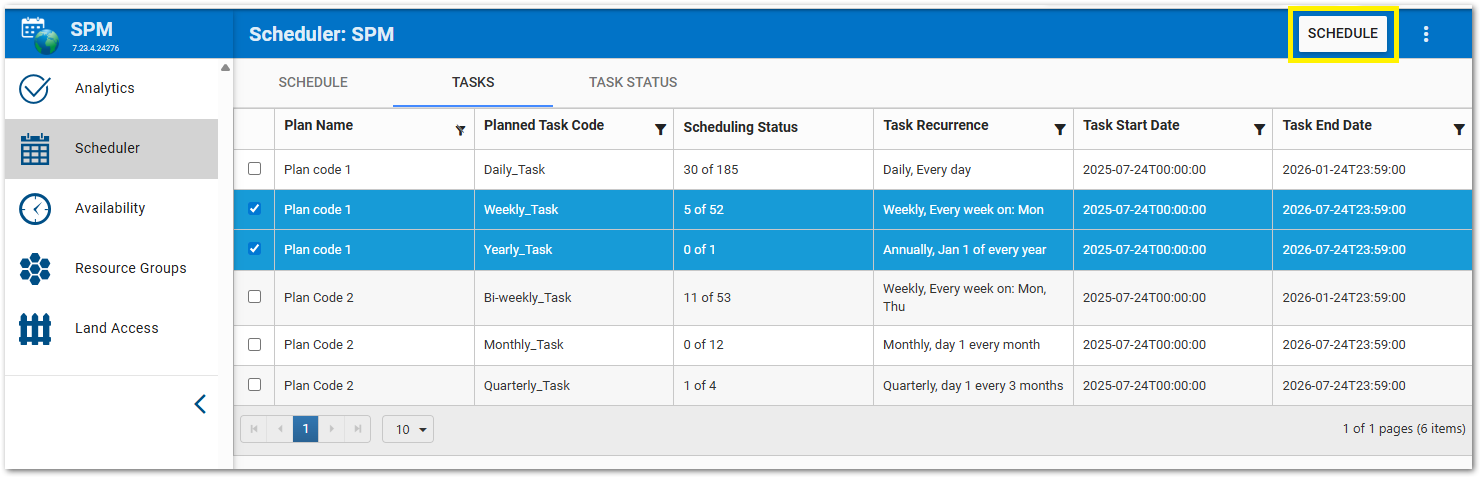
This will act similar to the Batch Processor functionality in SPM Desktop by updating the scheduling status of any tasks in the provided time frame. In the Schedule dialog, selecting the Schedule or Unschedule tabs will display planned or scheduled tasks accordingly.
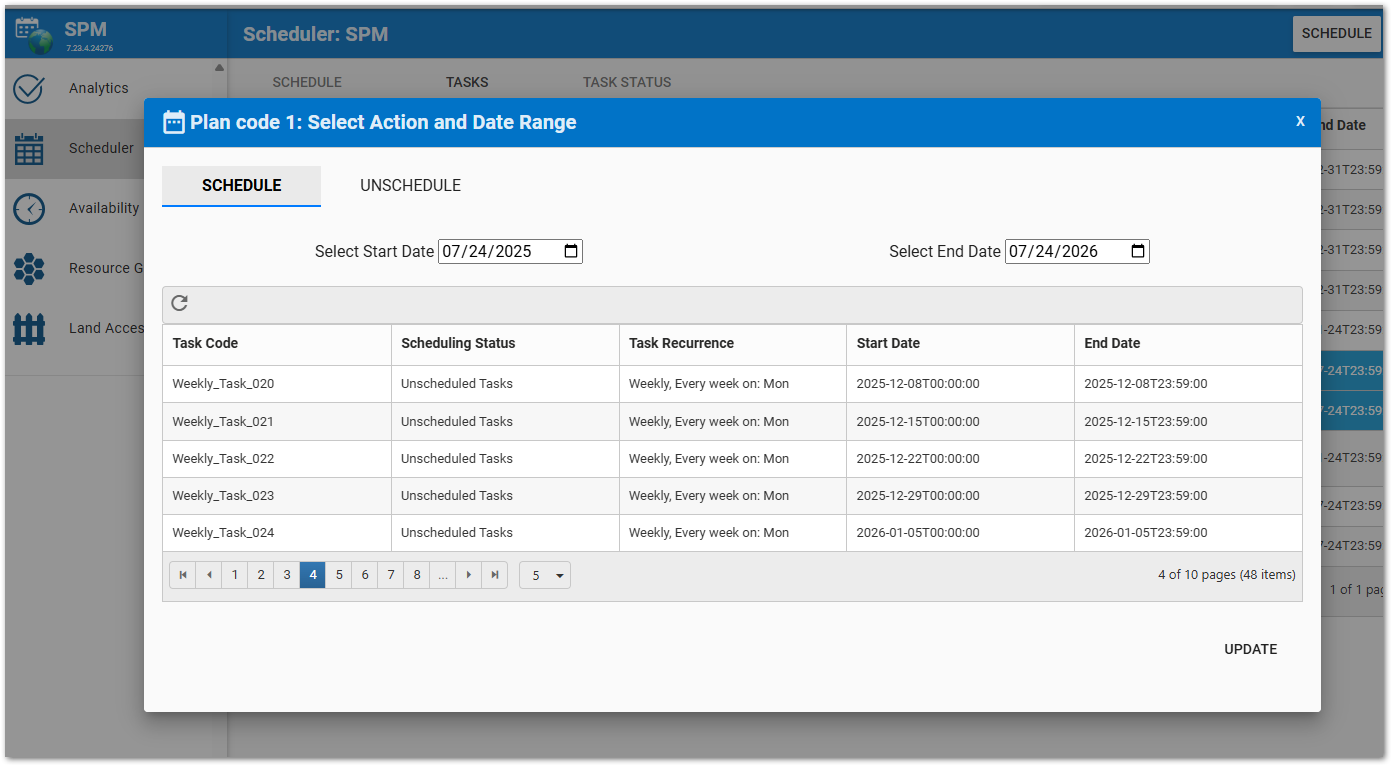
Displayed tasks are initially populated to show the entire plan time frame but can be limited to those within the selected start and end date by clicking Refresh on the available tasks grid.

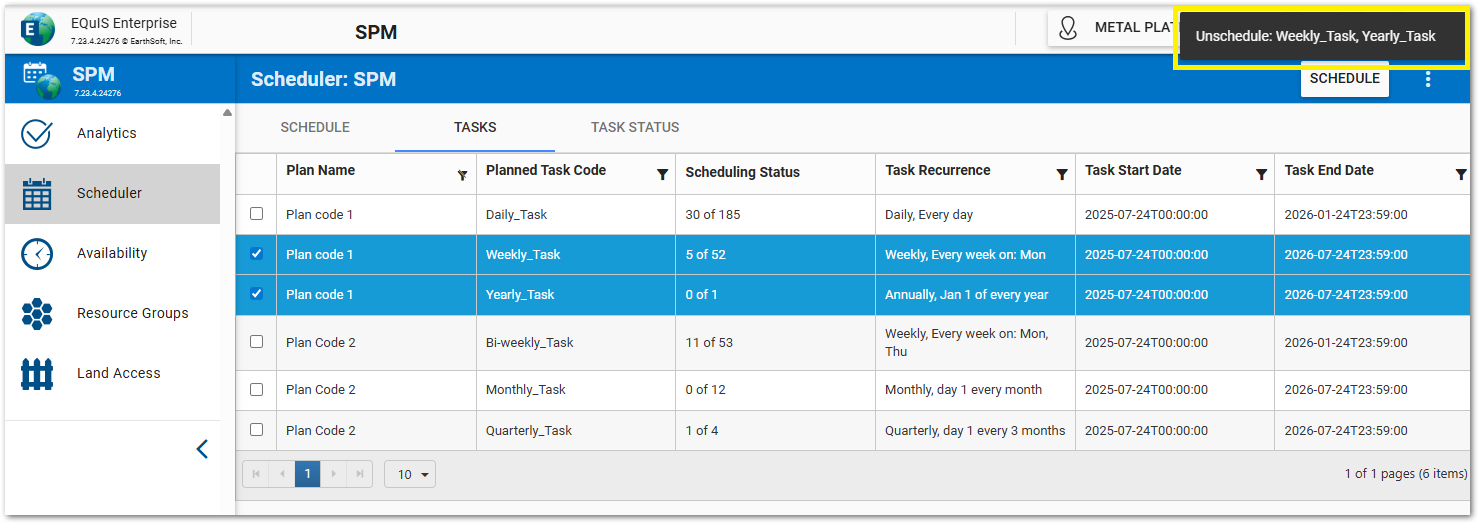
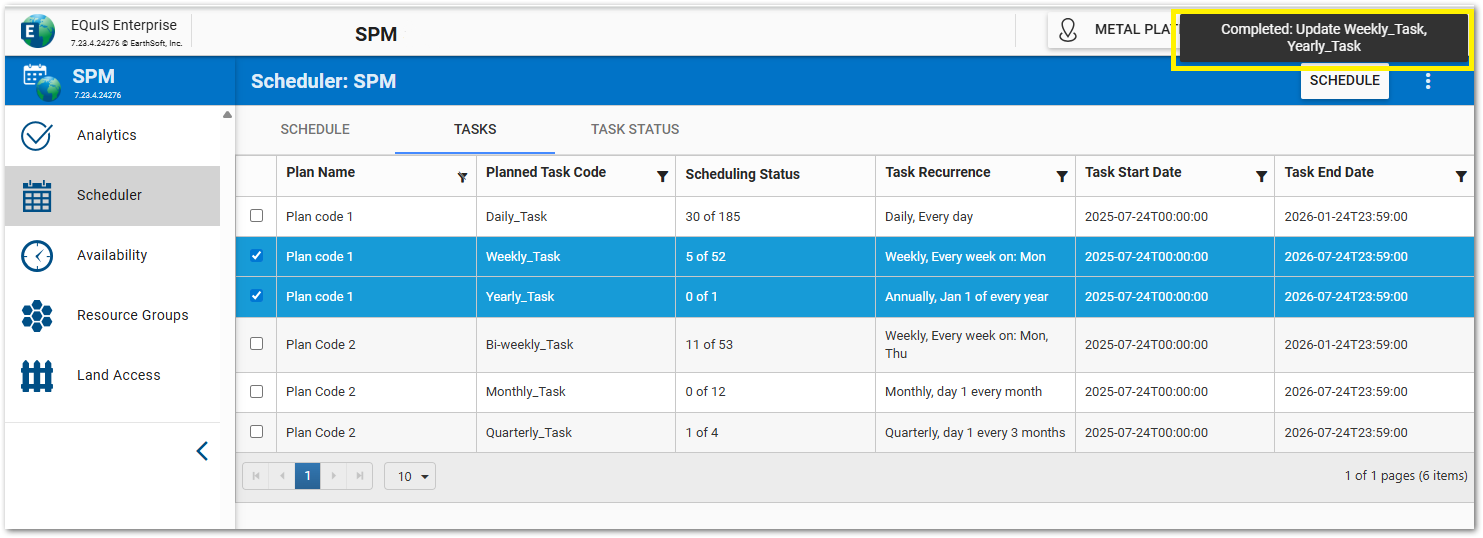
After pressing the Update button to schedule or unschedule tasks, the scheduling window will close and a message will appear to indicate that un/scheduling is being executed. When the update is stuck or completed, another message will appear to display the success status. Refresh the page in order to see the updated Scheduling Status.
Task Filtering

Tasks can be filtered by the following:
•Scheduled Tasks
•Unscheduled Tasks
•Active Tasks
•All Tasks (default)
Plan and Resource Filtering
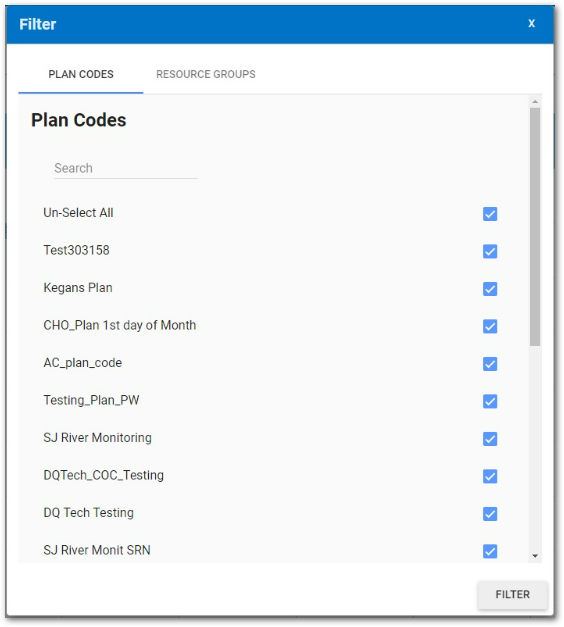
To filter by Plan Codes or by Resource Groups, click the Filter button.
Assigning/Removing Resources
Resources available to help with the execution of tasks are listed in the calendar, organized by Resource Groups. The calendar shows which resources are assigned to tasks by showing bubbles with task names on the resource’s row, matching up with the task’s date(s). If a task is selected in the Tasks section, the task and the header text for resources assigned to that tasks will highlight in red. Pressing the CTRL button allows for multiple tasks to be selected.
To add or remove task assignments to resources:
1.Drag and drop a task bubble from the Tasks section down to the row representing the resource to assign.
2.Select a task, then click anywhere in the row showing the desired resource.
3.Double-click a task, then click Edit Current Task. Tabs appear that organize available resources by Resource Groups. Select a Resource Group tab. Check or uncheck the box next to each resource to assign or unassign it. Click Save.
Remove any resource assignment by double-clicking the task’s bubble at the intersection of a resource and a date, then clicking the Delete button.
The Availability page lets the user schedule blocks of time when certain resources will be not be available for any tasks (e.g., when a person takes time off or when equipment needs to be serviced). A marker spanning the blocked time duration will overlay the appropriate dates on the resource’s row in the Scheduler.
If a user attempts to assign a task to a resource in a blocked-out time span, a message will indicate that the resource is unavailable. If a task is rescheduled to a different date that falls in a time span where its assigned resources are unavailable, a notification will show which assigned resources are unavailable. There are three options presented to address this situation:
1.Delete Appointments – Task is rescheduled to the intended date, but resource(s) unavailable at that time will be unassigned from the task.
2.Revert Changes – Abort changing the scheduled date of the task.
3.Keep Changes – Task and its assigned resource(s) are moved, despite the unavailability of its resource(s).
Scheduler Navigation
Date – Use the arrows next to the date stamp in the upper left to move from week to week or month to month. Click the date to pull up a date picker to jump to the desired date.
View – Displays the Scheduler in Monthly, Work Week, or Custom view. To set a custom view, select an end data from the calendar tool. The scheduler will display from the beginning of the current month to the selected end date.
Filter – Decide which planned tasks and resource groups are shown. The filter will be reset on a page refresh. The facility filter on the dashboard also filters the calendar to the facility/facility group chosen.
Print – Generate a print-friendly version of the current Scheduler view.
Bulk Change Option
Normally, each change made in the Scheduler is automatically saved. An additional option called Bulk Change will allow the user to make changes in bulk, then save all changes when complete. When a bulk save occurs, a popup window appears describing what has been changed and the user must input a comment on the change. Changes will also be saved when a task is moved to a different date. EarthSoft will need to activate the bulk change option.